Aloe Vera: A Must-have Herb for Skin and Hair Care

One of the most beneficial plants for skin and hair health is aloe vera. Easy to make your own and inexpensive to buy, aloe vera gel should be a key component in every skin and hair care routine.

Aloe Vera plant

Benefits of Aloe Vera

The plentiful benefits for skin and hair arise from aloe vera’s many nutrients and therapeutic properties:

  • Smooths fine lines by stimulating collagen production—vitamins A and C

  • Softens skin by preventing moisture loss—vitamins B12 and E

  • Promotes healthy skin cell growth and recovery—vitamin B12

  • Improves the elasticity of skin—antioxidant properties

  • Unplugs blocked skin pores—salicylic acid

  • Reduces dandruff—selenium

  • Eases an itchy, flaky scalp—anti-inflammatory properties

It is easy to make your own aloe vera gel if you have a plant and I give directions to do that below. One of the limitations of a home-made gel is the short shelf life. Once the gel is exposed to air, the oxidation process starts and nutrients start to lose potency. It lasts only about a week in the refrigerator and up to two months if you add a preservative. It’s a lot of work to go to for a daily routine, so if you’re not into that, purchasing a high-quality gel is the best option.

Use caution when selecting a commercially-produced aloe vera gel, as the gel you find in most stores has a low percentage of aloe vera and has added alcohol to preserve it. Look for high quality aloe vera in health food or vitamin stores or online that is at least 90% aloe vera. The other 10% of the ingredients will be antioxidants that help preserve the gel and add to its benefit.

I add a touch of aloe vera gel to most of my skincare products, but the product that features it most prominently is Lavender Mousse, made with lavender-infused jojoba oil and aloe vera gel. Lavender is a classic skin herb that calms inflammation and stimulates collagen production, while jojoba is so close to our own skin’s sebum that it is readily absorbed and acts as a protectant and cleanser. In addition to being a lovely face cream, it can also be used for sunburn relief, as aloe’s anti-inflammatory properties helps to cool minor burns.

DIY Aloe Vera Gel

To make your own aloe vera gel, follow these steps:

  1. The plant should be a few years old before you harvest the leaves. Choose thick leaves from the outer sections of the plant and remove no more than four leaves at a time.

  2. Cut the leaves close to the stem. Most of the beneficial nutrients are at the base of the leaves.

  3. Wash the leaf, removing any dirt.

  4. Cut off the tip of the leaf and stand it tip-side-down in a cup or bowl for 10-15 minutes to drain the latex-containing resin which is irritating to skin.

  5. After draining, wash off any resin that remains on the outside of the leaf.

  6. Cut off both of the leaf’s serrated edges, then using a small knife or vegetable peeler, peel off the thick outer skin on one side of the leaf.

  7. Scoop the gel out of the leaf, being sure not to include any pieces of the skin.

  8. If you want a smooth gel, blend it until frothy and liquified. It will keep for up to a week in the fridge.

  9. To keep it for up to two months in the refrigerator, add a preservative—either powdered vitamin C or E. For every 1/4 cup of aloe vera gel, add 500 mg of powdered vitamin C or 400 iu of powdered vitamin E directly to the blender.


Sources:

Gladstar, Rosemary, Medicinal Herbs: A Beginners Guide, 2012

Healthline.com, “How to Make Aloe Vera Gel”, https://www.healthline.com/nutrition/how-to-make-aloe-vera-gel, 2019


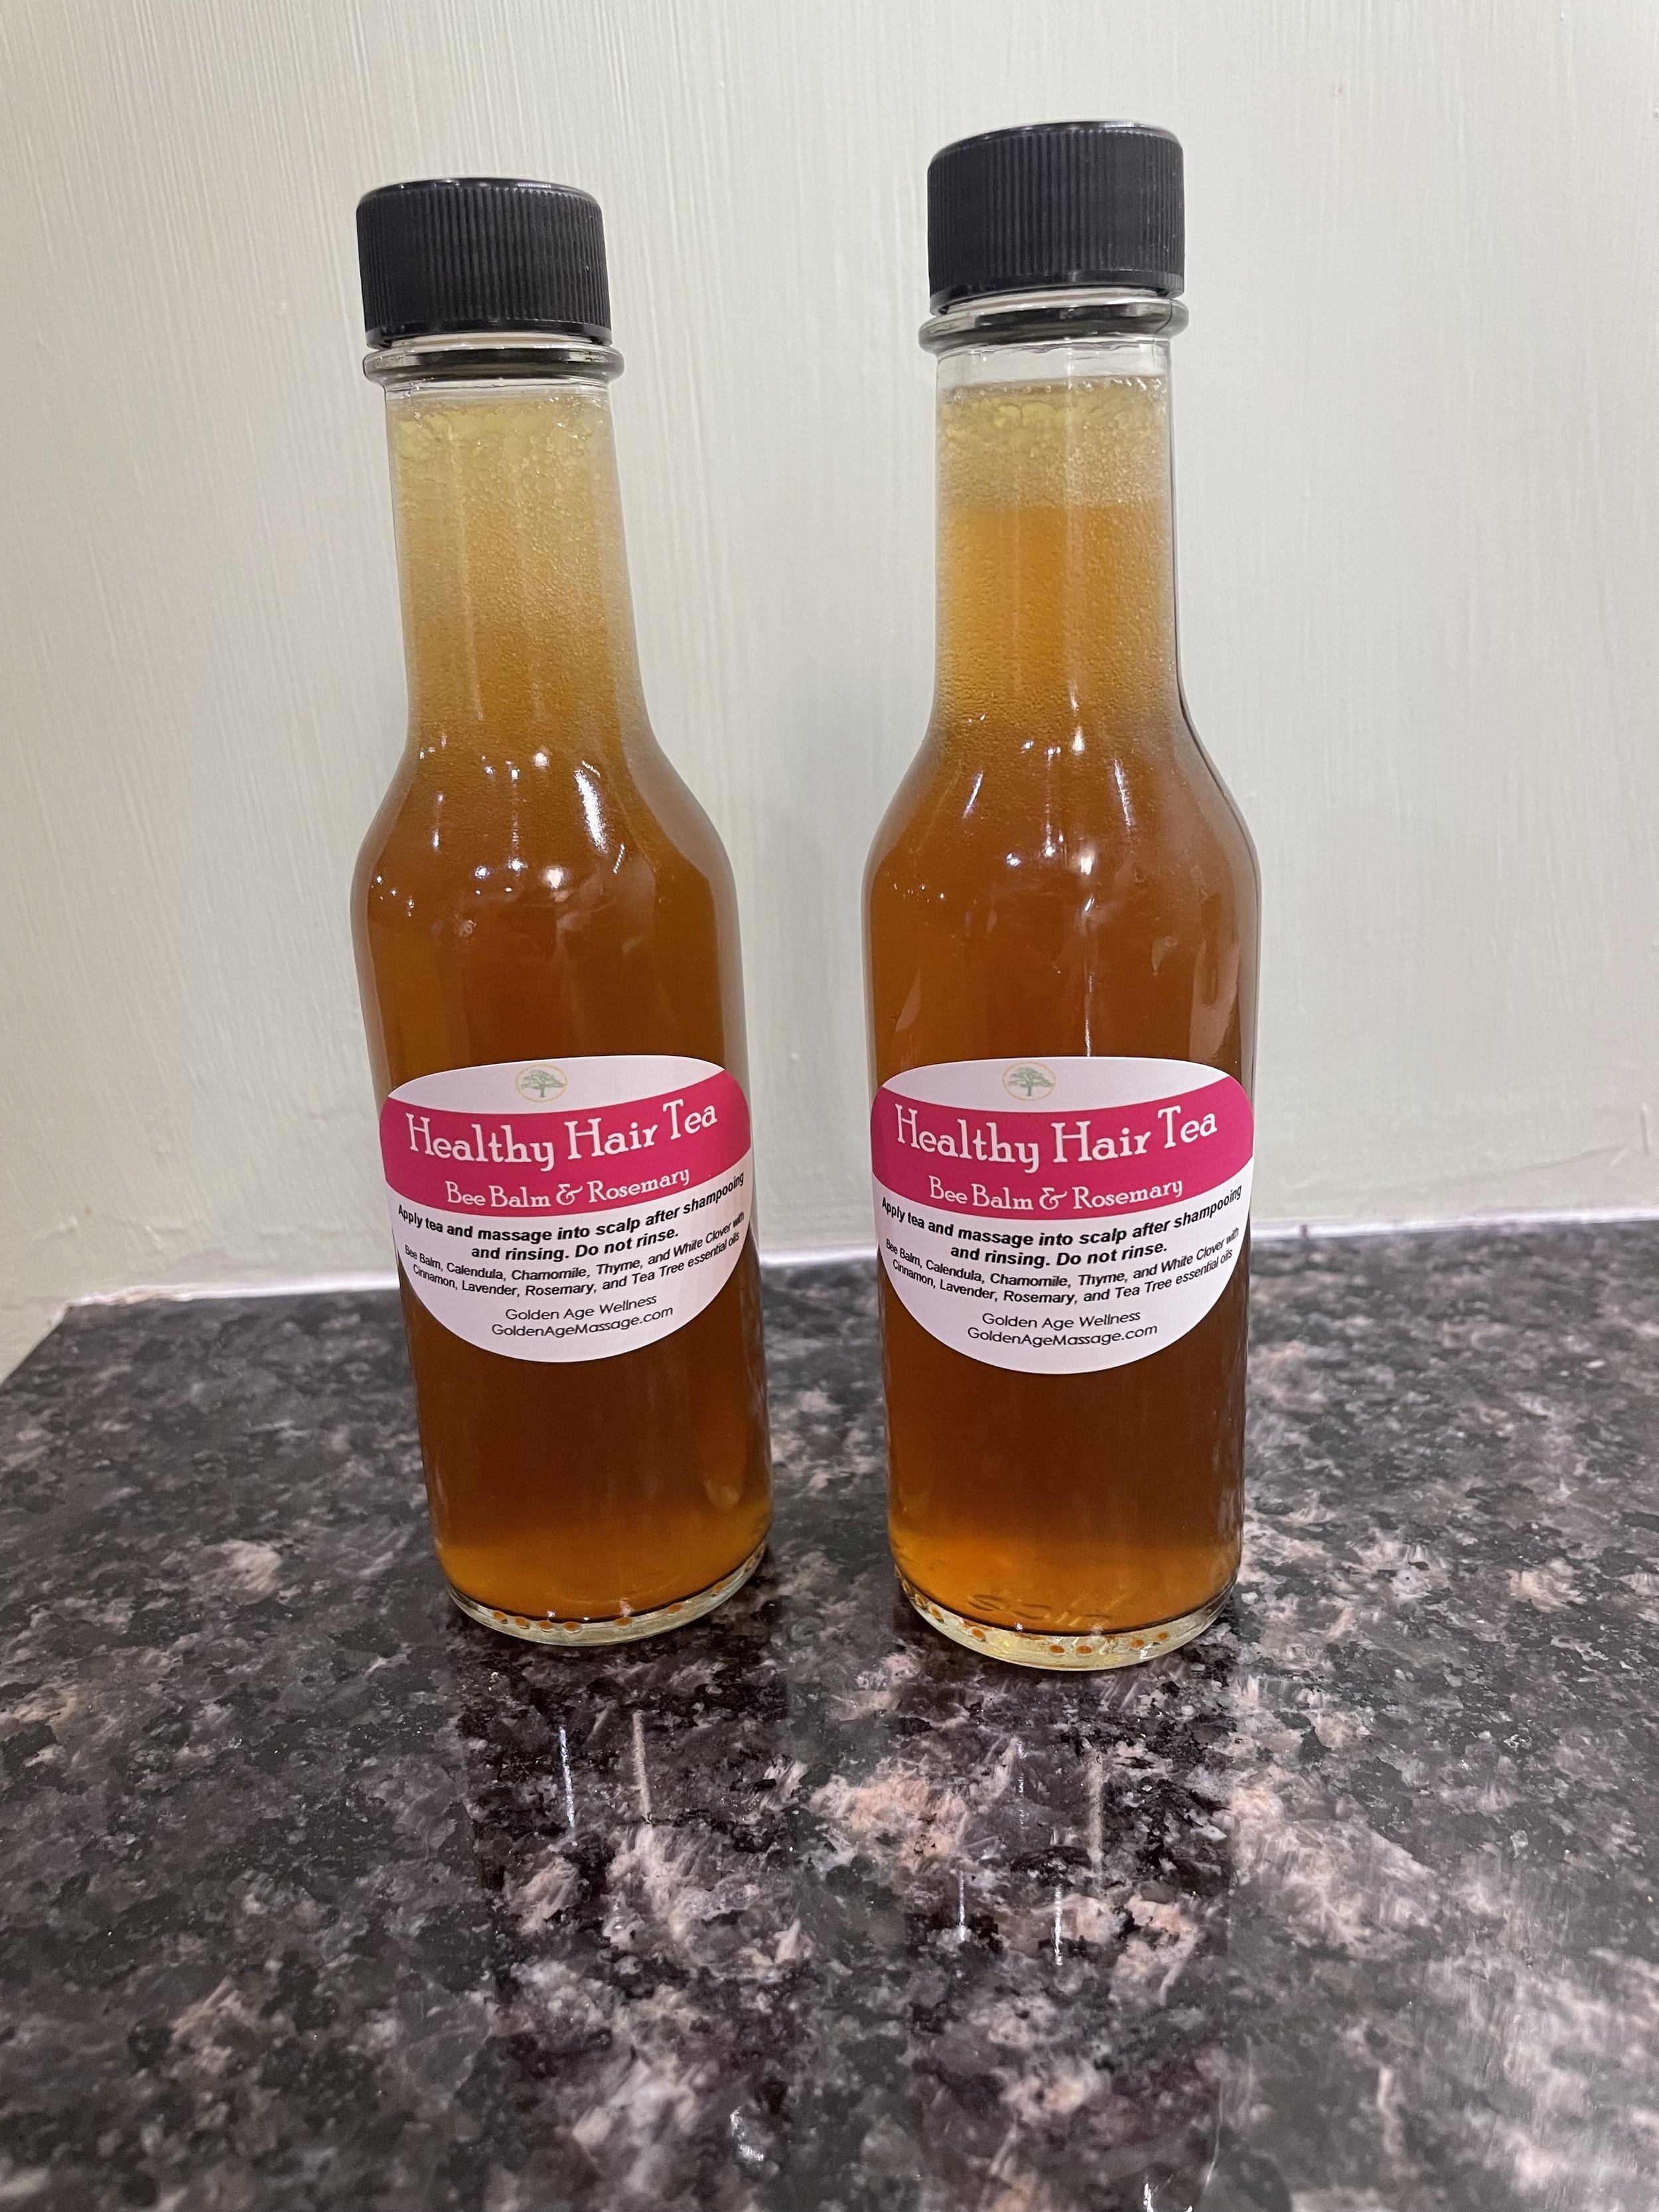
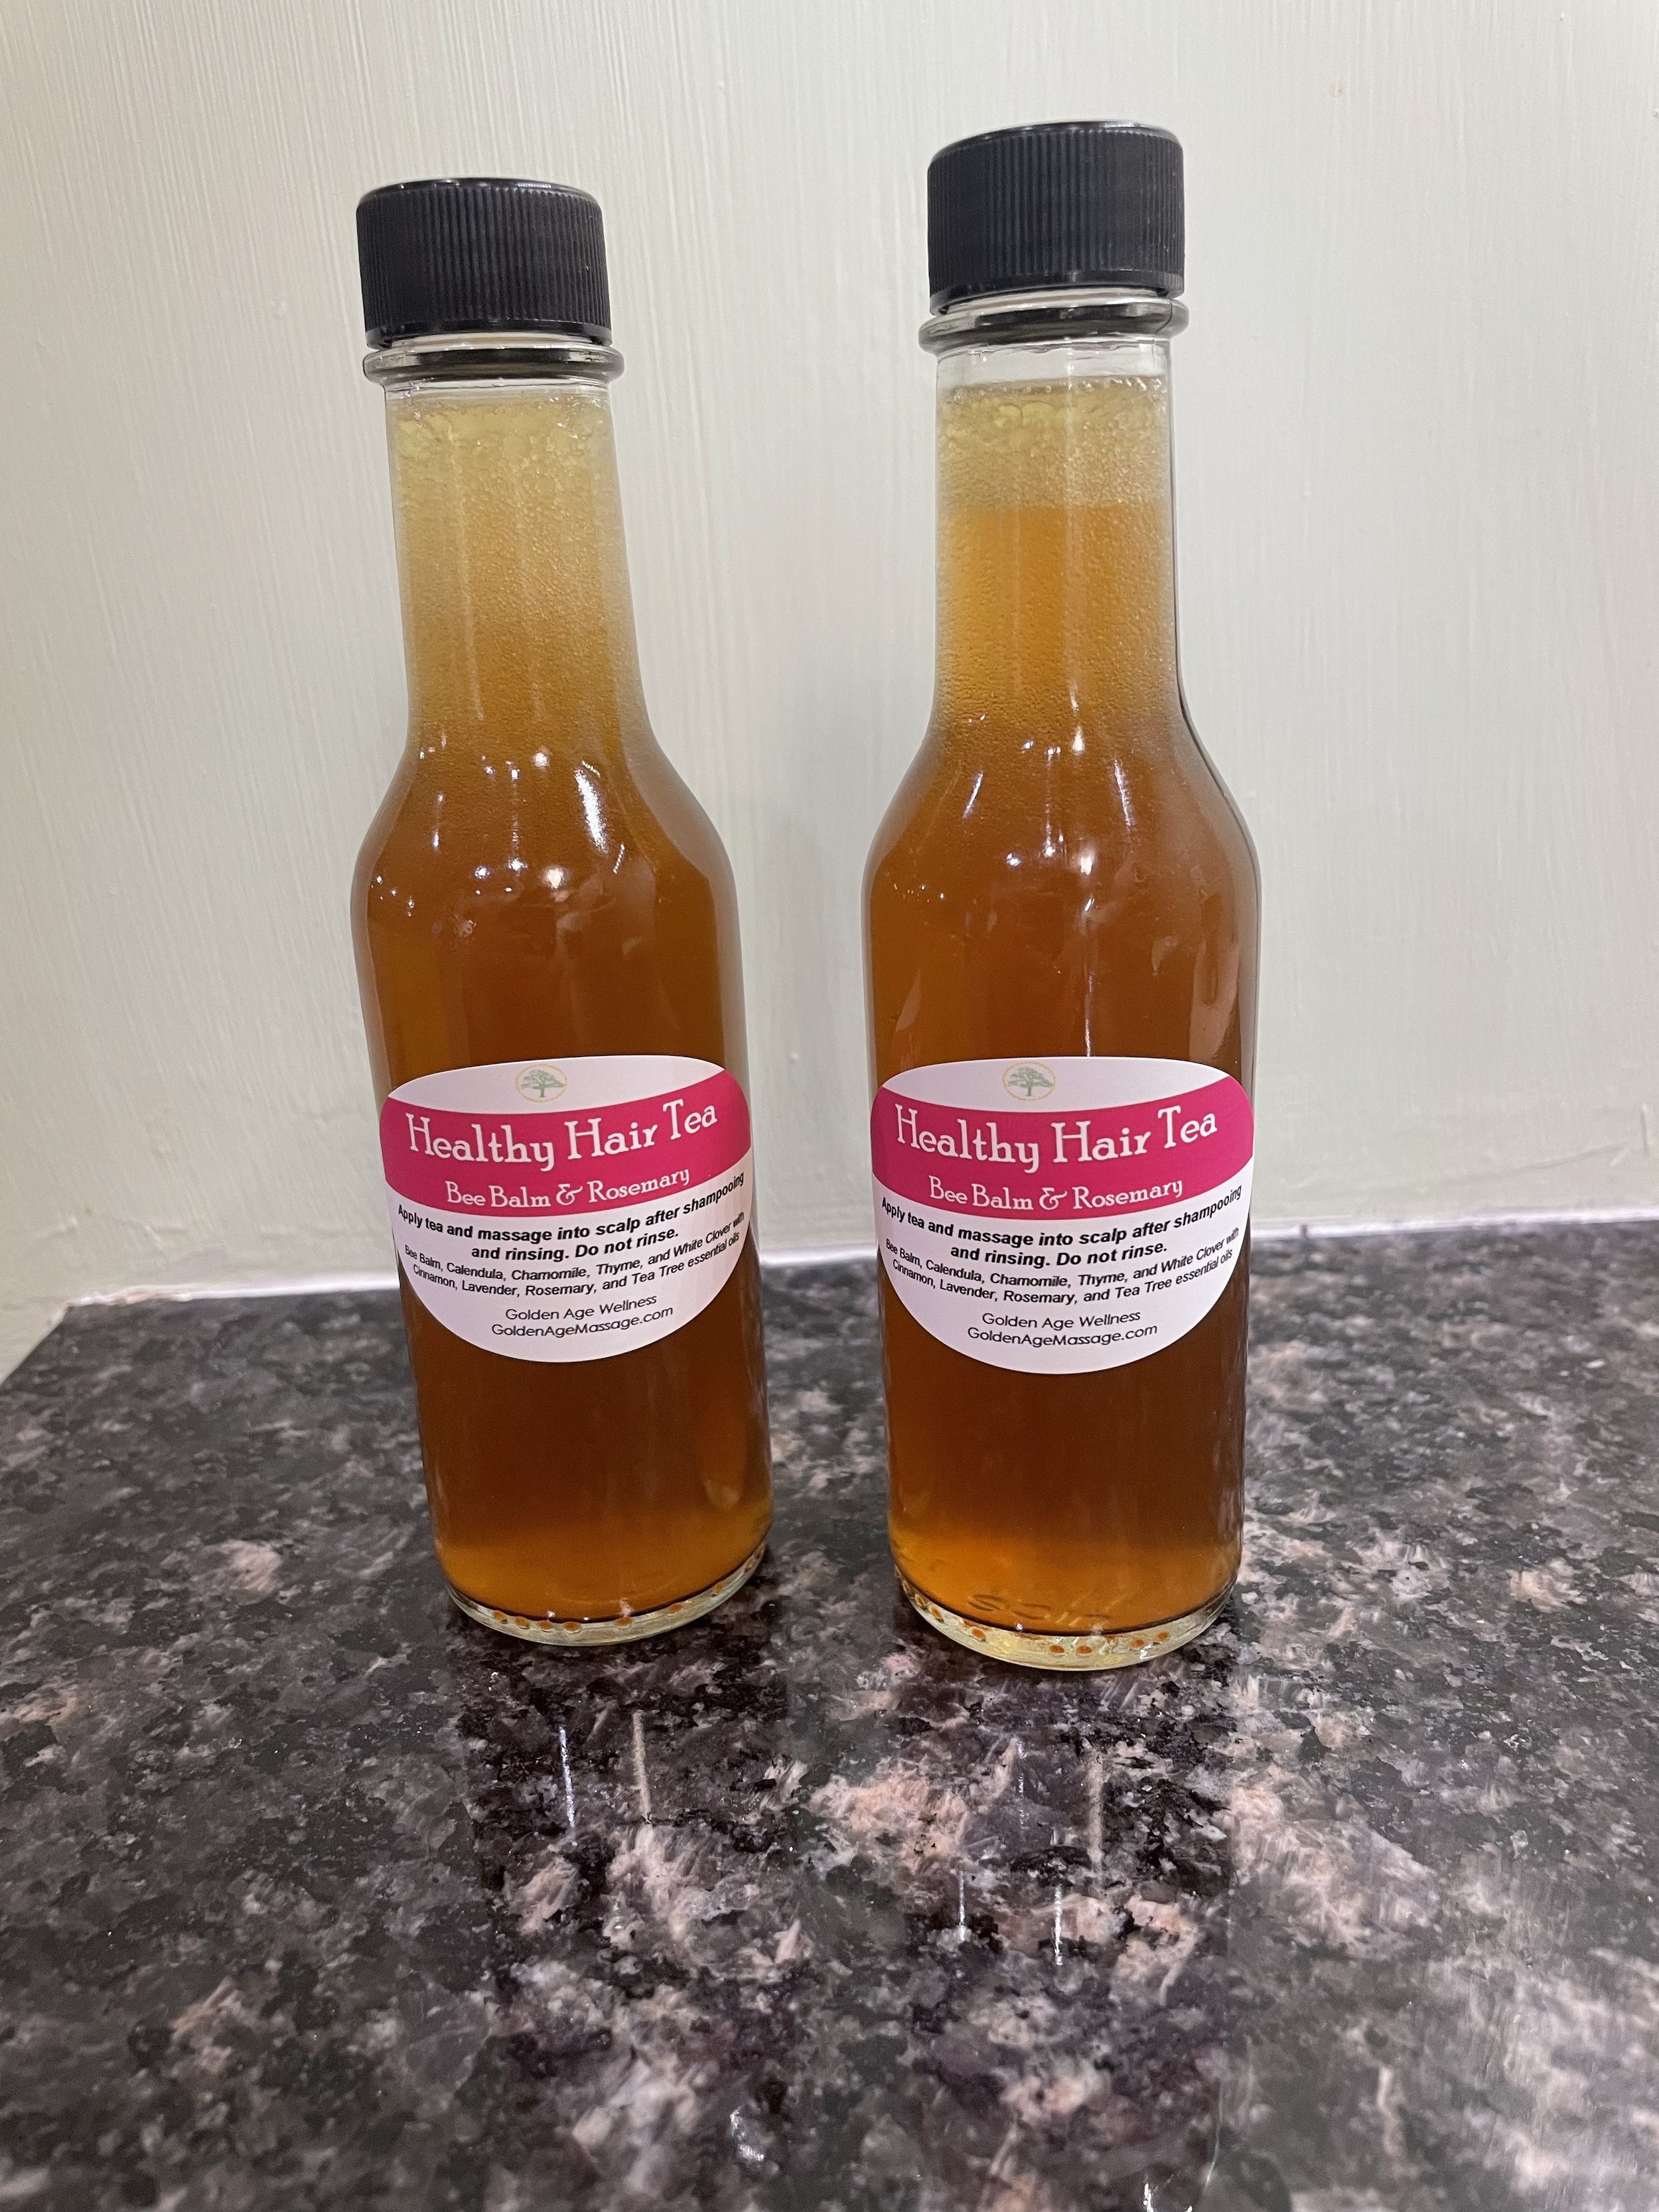
How to Make Healthy Hair Tea

I discovered this “beauty potion” in one of Rosemary Gladstar’s books. It’s easy to make with a variety of herbs that are readily found.

Healthy hair begins with healthy hair follicles. This herbal rinse involves steeping nutrient-rich herbs into a tea, then adding essential oils that prevent dandruff, reduce itchiness, and promote growth.

Step One: Gather Herbs

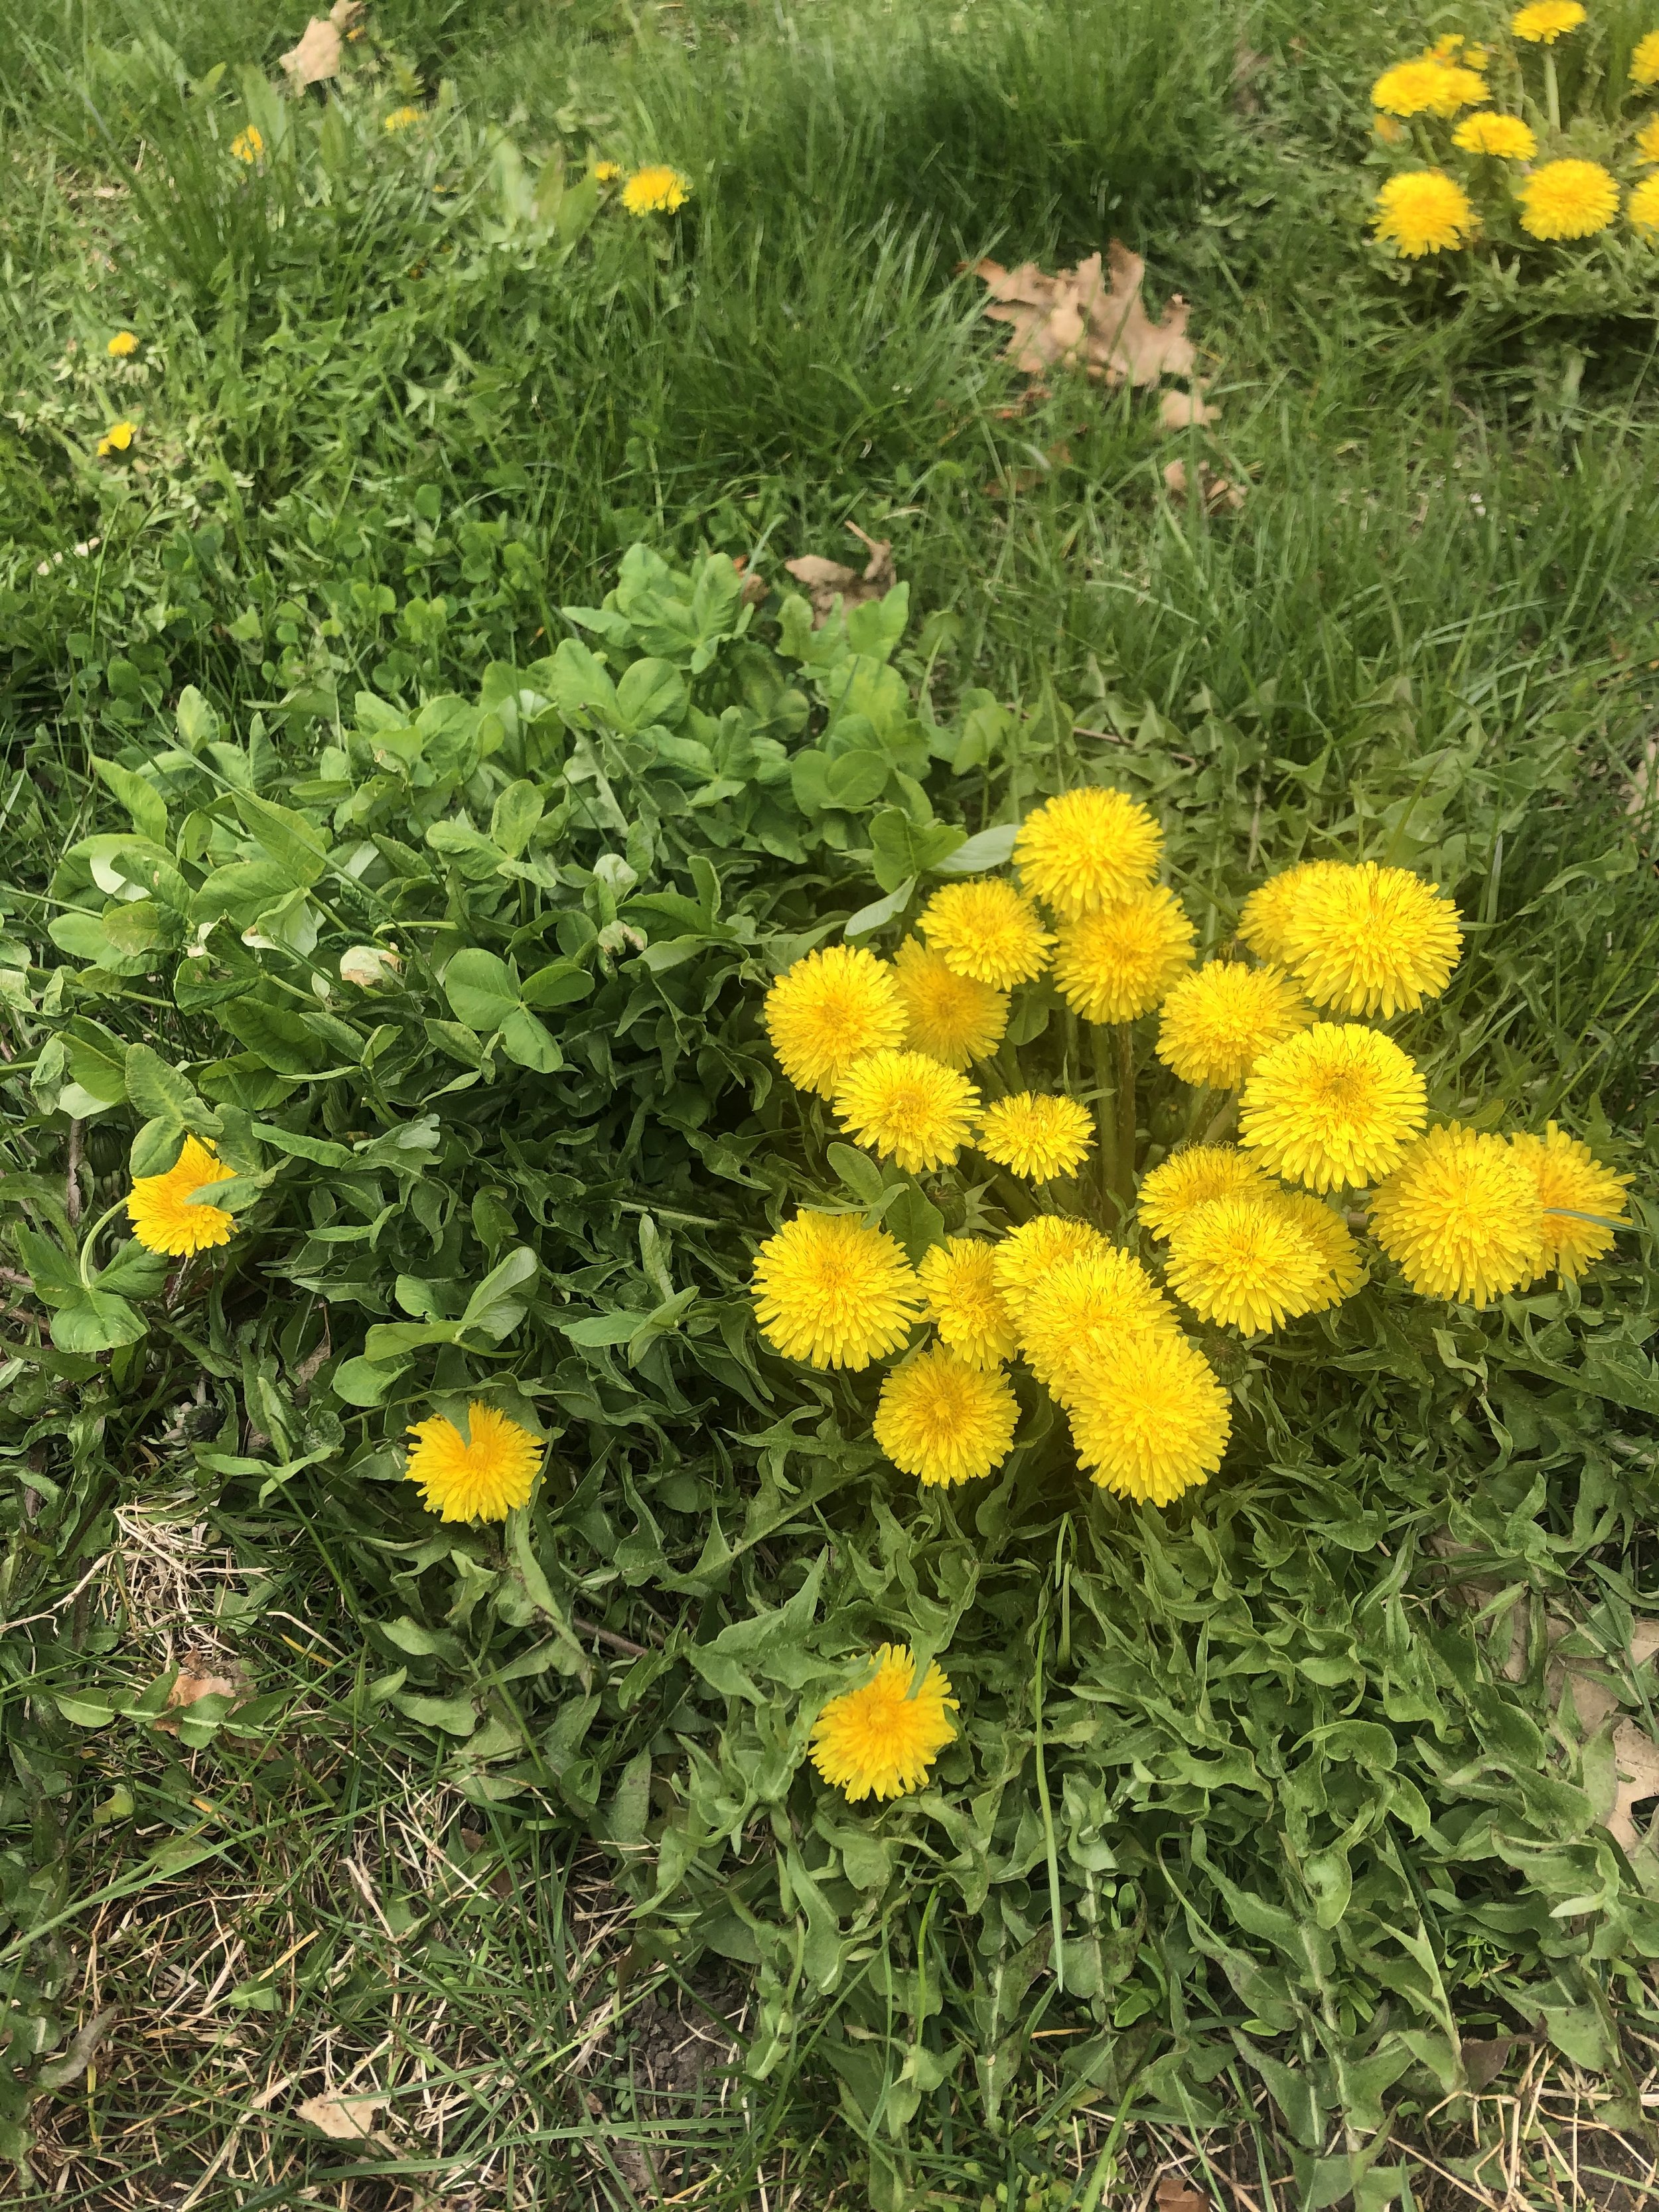
Scalp-loving herbs include bee balm, lavender, calendula, lemon balm, roman chamomile, thyme, and yarrow to name a few, but unless you grow these herbs, this tea might be difficult to make. Fortunately, there are several plants that are easily found growing in your yard or nearby parks that no one will mind if you pick: dandelion, white clover, plantain, and heal-all.

Step Two: Make Herbal Tea

Measure the freshly-picked herbs into a pot using a cup measure. If you are not able to make the tea right after you pick the plants, dry them in a hot, dry location out of the sun—garage, attic, or a paper bag put on the dashboard of a closed car. Add one quart (4 cups) of water for every two cups of herbs. Bring the water to simmering temperature—bubbles will just begin to form on the bottom and side of the pot. Do not boil. Turn down the temperature and simmer for 20 minutes. Turn off the heat and let the herbs steep an additional 20 minutes.

Step Three: Strain the Tea

Strain the herbs out of the tea using a colander set in a bowl large enough to hold the amount of water you used. Remove the colander. If there are large bits of herb still in your tea, you can strain again by putting a coffee filter or paper towel into the colander, placing it into another bowl, then straining again. Let the tea cool.

Step Four: Add Essential Oils

After the tea cools, you can add essential oils in a 3% dilution (18 drops per ounce). If for a child or an elderly person, use a 1% dilution (6 drops per ounce). You do not have to add essential oils, but they add extra oomph to the tea by reducing dandruff (Tea Tree), soothing itching (Lavender and Tea Tree), and promoting growth (Rosemary and Cinnamon). There are other essential oils that address these same concerns, but this is my favorite blend in terms of aroma and safety.

Step Five: Bottle Your Tea

Find a bottle that you can use in the shower. If you have made several quarts, store the extra tea in a large container and refill your shower bottle when it runs low. You may want to hold off on adding the essential oils until you refill your shower bottle so that you don’t have to use such a large amount. Place a funnel over the bottle opening and ladle or use a measuring cup to pour the tea into the bottle. Stir up the mixture right before you bottle it—the essential oils separate from the tea.

Step Six: Use Your Tea

1) Shake up your bottle right before you apply the tea—the essential oils will rise to the top and you want an evenly-mixed application.

2) After shampooing, conditioning, and rinsing, apply about a tablespoon of the tea to your scalp.

3) Massage into scalp and leave in—do not rinse.